The Little Number That Grounds a Flight: Reading Real Wind at the Launch Site
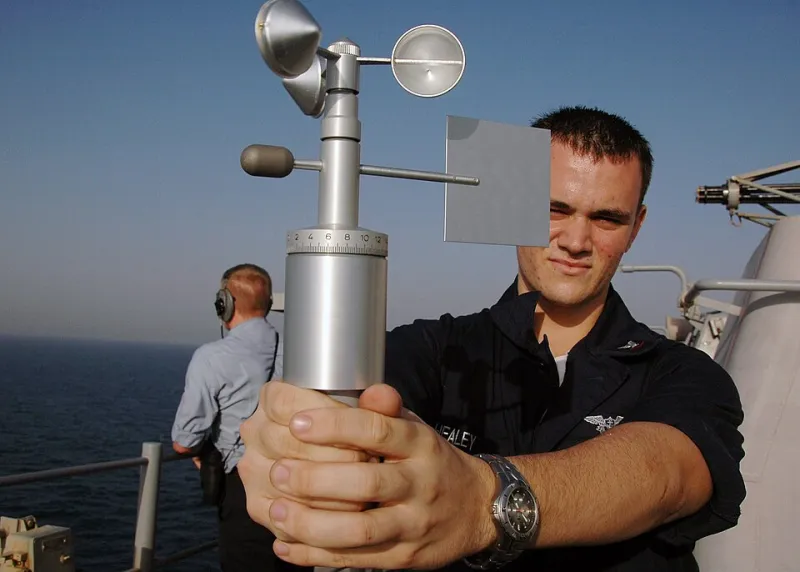
Photo: U.S. Navy photo by Mass Communication Specialist Seaman Tiffany Sivels, Public domain, via Wikimedia Commons
The Forecast Is a Hint, Not a Verdict
Every UK drone pilot has had the same conversation with themselves. The weather app says 9 mph, the met office graphic shows a friendly little cloud, and the car is already packed. Then you arrive at the launch site and the trees are doing that sideways lean that suggests the app has been reading a different postcode.
That gap between a regional forecast and real launch-site conditions is exactly where a pocket anemometer earns its keep. It is not a glamorous bit of kit. It does not improve your footage, extend your range or make your edits any sharper. What it does is put a number on the thing most likely to cut a flight short: the wind that is actually hitting the aircraft.
Forecasts are modelled over wide areas. They are brilliant for planning the day, useless for telling you whether the gap between two terrace roofs is funnelling a gust across your take-off point. As of late 2026, handheld wind meters are cheap enough to live in the flight bag, and the habit of using one is more valuable than the gadget itself.
Why Launch-Site Wind Beats a Regional Number
Wind is a local bully. It gets squeezed between buildings, accelerated over ridges, broken up by hedges and smoothed out over open water. A coastal path can be calm in the car park and lively at the cliff edge. A sheltered valley can feel almost still until you climb twenty metres above the treeline. An urban rooftop can be peaceful on one side and a wind tunnel on the other.
For drone work, the number that matters is not just average wind speed. It is the gust spread, the direction relative to your flight path, and how quickly conditions are changing. A steady 12 mph is a different proposition from 6 mph with 18 mph gusts. The first is manageable for many larger aircraft in the right hands. The second can slap a lightweight drone around and make your gimbal footage look like it was shot during a minor earthquake.
A handheld anemometer gives you a current reading at head height or above. That is still not the same as wind at 60 metres, but it is a much better anchor point than a forecast for a town ten miles away. It also forces a pause. You have to stand still, face the wind, take a reading and make a decision. That pause is half the safety benefit.
Choosing a Pocket Wind Meter That Suits UK Flying
You do not need laboratory-grade equipment to make sensible go/no-go calls. A decent handheld vane anemometer or a small hot-wire unit will cover most recreational and commercial drone work. Cup anemometers are fine on a mast but less handy in a jacket pocket. Sonic meters are lovely, pricey and arguably overkill unless you are doing repeated survey work in exposed locations.
Look for a few practical things:
- Gust capture or max hold. A live average is useful; a maximum reading tells you what the site is really doing.
- Wind chill or temperature. Not essential, but useful context on a cold morning when battery performance is already on your mind.
- A lanyard or wrist loop. Dropping a wind meter from a rooftop is a special kind of bad day.
- Simple units. Most UK pilots think in mph, but aviation forecasts often use knots. Pick one and stick to it in your log.
- Calibration honesty. Budget meters can drift. Treat readings as indicative, not gospel, and replace anything that has been soaked, dropped or left in a hot van for a summer.
A basic vane meter in the £30–£80 range is enough for most people. If you are flying commercially and need to defend decisions, a slightly better unit with max-hold and a clear display is worth the extra. Keep it in the same pocket as your landing pad pegs, not buried under three layers of gloves and a spare prop bag.
Reading the Gust Factor Without Overthinking It
Gust factor is simply the relationship between the steady wind and the stronger peaks. If the average is 8 mph and the gusts are hitting 20 mph, the site is telling you something important. Lightweight aircraft with high surface area will feel those peaks. Larger, heavier airframes cope better, but no drone enjoys turbulence near buildings or cliff edges.
A workable field approach is to take a reading for 30–60 seconds, note the average and the max, then compare that with the manufacturer’s stated wind resistance for your aircraft. Treat the manufacturer figure as a ceiling, not a target. For a sub-250g drone, a steady 10 mph with gusts over 15 mph is already a cautious day. For a larger commercial airframe, 15 mph steady might be acceptable in open ground, but 20 mph gusts near a rooftop are a different job.
Direction matters too. If the wind is blowing offshore at a coastal site, your return leg may be slower and battery-hungrier than the outbound leg. If it is crossing your flight path, your footage may crab and your gimbal will work harder. A wind meter does not answer all of that, but it gives you a starting number to reason with.
Three Sites, Three Wind Stories
The exposed coastal path. You park in a dip, walk five minutes to the cliff, and the anemometer jumps from 6 mph to 17 mph with 24 mph gusts. The forecast said 11 mph. This is not a conspiracy; it is topography. At a site like this, measure at the actual launch point and again a few metres back. If the sheltered spot is flyable and the edge is not, fly from the sheltered spot or pick another day. Do not let the walk convince you the flight is owed to you.
The urban rooftop. Rooftop jobs are notorious for wind that arrives in pulses between buildings. Take readings on more than one side of the roof. A reading of 9 mph at the access door can become 15 mph at the parapet. Keep the aircraft away from corners and lift shafts, and log the direction. If the gusts are unpredictable, postpone. A roof survey is not worth a flyaway over a car park.
The sheltered valley. This is the sneaky one. At ground level the air is calm, the anemometer says 3 mph, and everything feels easy. Then you climb above the ridge and the aircraft meets the real wind. Use the meter at launch, but also watch the trees, flags and cloud movement higher up. A pocket anemometer is a launch-site tool, not a full atmospheric survey. In valleys, give yourself more margin and keep the flight close.
A Compact Wind Kit for the Flight Log
You do not need much. A small anemometer with max hold, a lanyard, a spare battery if it uses one, and a notebook or app entry are enough. Add a simple wind log template to your pre-flight routine:
- Date, time and location
- Forecast wind speed and direction
- Measured average and maximum gust at launch
- Wind direction relative to flight plan
- Aircraft type and manufacturer wind limit
- Go/no-go decision and a one-line reason
That last line is the one that matters. “Measured 11 mph gusting 19 mph at cliff edge; forecast 8 mph; postponed roof inspection” is a useful record. It shows you checked, reasoned and acted. If you ever need to explain a cancelled job or a cautious call, that little entry is worth more than a vague memory of it being “a bit breezy”.
The Habit, Not the Hardware
The best anemometer is the one you actually use. Keep it accessible, take the reading before the props go on, and write the number down. Forecasts are for planning; launch-site measurements are for deciding. In a country where the weather can change its mind between the car and the landing pad, that small pocket habit is one of the cheapest safety upgrades going.